Avoiding Wrapper Divs in ReactJs

Hi everyone,

Just a quick post on how you can avoid wrapper divs in ReactJs. It’s particularly useful when populating tables or creating parts of a larger component. Instead of the following:

return (
  
Frogs Turtles
);

You can use fragments:

import React, { Fragment } from 'react'
...
return (
  
    Frogs
    Turtles
  
);

The fragment won’t polute the dom and mean that you don’t need to add any additional styling. Check out these links for more info:
https://reactjs.org/docs/fragments.html
https://stackoverflow.com/a/49375945/522859
https://reactjs.org/blog/2017/11/28/react-v16.2.0-fragment-support.html

How to Add a FontAwesome Icon using :after

Hey everyone,

Just a quick post on how to add a fontawesome icon using :after:


.fl-cart-product-price:after{
content: 'f00d';
font-family: FontAwesome;
font-weight: normal;
font-style: normal;
margin: 0px 0px 0px 10px;
color: #555;
font-size: 85%;
text-decoration: none;
}

See this stackoverflow post for more info: http://stackoverflow.com/a/18793584/522859

Dragging a File from File Explorer Causes Google Chrome to Crash

Hey everyone,

A team member found an interesting bug today that caused chrome to go non-responsive. The cause was simply dragging a file from the file explorer onto a drag and drop upload area. It is reproducible on every site I’ve tested, including Gmail and Dropbox.

Reproduce

  • Go to https://mail.google.com
  • Click compose
  • Click attach files (close any of the annoying popups that appear)
  • DRAG a number of files from the file selector window to the new message screen (they will start to upload) (IMPORTANT: these need to be dragged from the file selector popup, NOT a new explorer window)
  • While they are still uploading hit cancel on the file browser window. Browser will go non-responsive

A bug has been reported here: https://code.google.com/p/chromium/issues/detail?id=388661

Random Class Directive – AngularJS

Hey everyone,

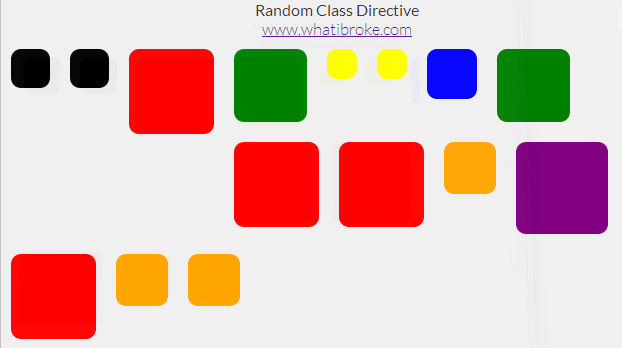
Just another small directive. This one adds a random class from the provided array to the element.

Check out this fiddle to see the demo: http://jsfiddle.net/uvSVj/3/

Random Background Directive

I used this directive to add a random background to each of my wrapper divs:

Random Background Real World Usage

To use it in your app simply define a list of classes in your controller:

app.controller("MyCtrl", function MyCtrl($scope) {
    
    /* A random class is picked from this list */
    $scope.classes = [
        //"bg-buildings",
        "red",
        "blue",
        "yellow",
        "green",
        "orange",
        "black",
        "purple"
    ];        
});

Then add the directive to your page (can be an existing element):

A random class will then be selected from the list and appended to the elements current list of classes (if any).

The easiest way to see how it’s done is probably just to check out the fiddle above, but there’s a code dump below if you need it:

The Random Class Directive

app.directive("ngRandomClass", function () {
    return {
        restrict: 'EA',
        replace: false,
        scope: {
            ngClasses: "="
        },
        link: function (scope, elem, attr) {            

            //Add random background class to selected element
            elem.addClass(scope.ngClasses[Math.floor(Math.random() * (scope.ngClasses.length))]);
        }
    }
});

Sample Html

Random Class Directive

www.whatibroke.com

Sample JS

/* 
    http://www.whatibroke.com/?p=899
    Adds a random class to element
    Usage: add ng-random-class to element
*/

var app = angular.module('myApp', []);

app.controller("MyCtrl", function MyCtrl($scope) {
    
    /* A random class is picked from this list */
    $scope.classes = [
        //"bg-buildings",
        "red",
        "blue",
        "yellow",
        "green",
        "orange",
        "black",
        "purple"
    ];        
});

Sample Styles

/* Just a demo div */
.test{
    width: 50px;
    height: 50px;
    margin: 10px;
    padding: 5px;
    float: left;   
    -webkit-transition: 400ms linear all;
	-moz-transition: 400ms linear all;
	-ms-transition: 400ms linear all;
	-o-transition: 400ms linear all;
	transition: 400ms linear all;
    cursor: pointer;
    border-radius: 10px;    
}

.test:hover{
    opacity: 0.8;    
}

body{
	background-color: #F0F0F0;
	font-family: "Lato", sans-serif;
	font-weight: 300;
	color: #363636;
    text-align: center;
    vertical-align: middle;
}

/* Random classes */
.red {
    background-color: red !important;
    height: 75px;
    width: 75px;
}

.blue {
    background-color: blue !important;
    height: 40px;
    width: 40px;
}

.yellow {
    background-color: yellow !important;
    height: 20px;
    width: 20px;
}

.green {
    background-color: green !important;
    height: 63px;
    width: 63px;
}
.purple {
    background-color: purple !important;
    height: 82px;
    width: 82px;
}
.black {
    background-color: black !important;
    height: 29px;
    width: 29px;
}
.orange {
    background-color: orange !important;
    width: 42px;
    height: 42px;
}

Let me know if you run into any issues and feel free to use/change however you want.

Forcing a Link to Behave Normally – AngularJS

Hey everyone,

Another quick post. Working with AngularJS this morning I had a need for a link to redirect to a login page that was not contained within the “angular” part of the app. Unfortunately Angular was overriding the behavior and trying to route it.

The solution is fairly easy for this, simply add a target attribute:


Sign In


Sign In

There are a few other solutions depending on your use case, check out the following StackOverflow post for more info: http://stackoverflow.com/a/16838013/522859

ng-class with ng-repeat – AngularJS

Hey everyone,

Just another quick AngularJS post. This one is for using ng-class with ng-repeat. The goal here is to have a class applied to the non-selected elements. To start with, we’ll chuck the following in our controller:

$scope.transmission = {
selected: null,
options: [
{
name: 'Any'
},			
{	
name: 'Manual'
},			
{
name: 'Automatic'
}			
]
};

Here we’re just creating a few random objects. To keep things simple we’re going with transmission types: a manual car, automatic or any. Next you’ll want to add the markup:

...
{{option.name}}
...

Finally the class to be applied:

.line-through{
	text-decoration: line-through;
}

Creating a ‘Starts With’ Filter in AngularJs

Hey everyone,

Just a quick post on how to create a simply custom filter in AngularJS. We’ll be using the same regions objects as the other day:

{
	"regions": [
		{
			"id": "1",
			"postcode": "4700",
			"name": "Rockhampton",
			"description": "One of the major cities in Central Queensland."
		},
		{
			"id": "16",
			"postcode": "4214",
			"name": "Keppel Island",
			"description": "Awesome islands, very few people, heaps of fish beautiful clear water."
		}
	]
}

We’ll create the filter like so:

app.filter('regionsWithPostcode', function(){
	return function(regions, postcode){

		//Create vars
		var matching_regions = [];		

		//Check if input matches current postcode
		if(regions && postcode){		 	
		 	
		 	//Loop through each region
			for(var i = 0; i < regions.length; i++){
				if(regions[i].postcode.substr(0, postcode.length) == postcode){
					matching_regions.push(regions[i]);
				}
			}

			//Return matching regions
			return matching_regions;
		}
		else{
			return regions;
		}		
	}
});

And finally, we’ll setup the HTML as follows:

	
Use Postcode
{{region.name}}

Filter by Object Property in Ng-Repeat – AngularJS

Hey everyone,

Just a quick post on how to filter by a property when using ng-repeat. To start with, we’ll use the following objects:

{
	"regions": [
		{
			"id": "1",
			"postcode": "4700",
			"name": "Rockhampton",
			"description": "One of the major cities in Central Queensland."
		},
		{
			"id": "16",
			"postcode": "4214",
			"name": "Keppel Island",
			"description": "Awesome islands, very few people, heaps of fish beautiful clear water."
		}
	]
}

Then assuming you want to filter by the postcode all you need is the following:

Region

{{region.name}}

AngularJS ngAnimate Transitions – Basic Demo

Hey everyone,

I’ve just starting using Angular and went to do a few animations. I had a bit of trouble trying to find anywhere that mentioned what each class does. This is the demo we’ll be making, it’s pretty basic but hopefully enough to get you started: JSFiddle Demo

Dummy Page
To start with, just create a new page with the following. Note that none of the stuff below applies to the animation itself, this is just so that we’ve got something to work with.


		Test Animation


Add
{{person.name}}
//ajax.googleapis.com/ajax/libs/angularjs/1.1.5/angular.min.js //Initialisation stuff, note that you don't need any of this for animations, just using it so there's something to see function PeopleController($scope){ $scope.name = ""; $scope.people = [ { name: "Santa Clause"}, { name: "Easter Bunny"}, { name: "Tooth Fairy"}, { name: "Chris Owens"}, { name: "Phillip Farnsworth"}, { name: "Clark Kent"}, { name: "Lana Lang"} ]; $scope.removePerson = function(row){ $scope.people.splice(row, 1); } $scope.addPerson = function(){ $scope.people.push({name: $scope.name}); $scope.name = ""; } }

Adding the ng-animate Directive
The first step to adding the transitions is to add the ng-animate directive:

{{person.name}}

Classes for Adding a New Element
Now we’re going to add the styles that are used when a new element is added to the page. To start with, you’ll want to create .person-enter. This is the class that will be animated from. In this instance we want new elements to start off invisible so we’ll set the opacity to 0.

.person-enter{
	-webkit-transition: 1s linear all;
	-moz-transition: 1s linear all;
	-ms-transition: 1s linear all;
	-o-transition: 1s linear all;
	transition: 1s linear all;
	opacity: 0;
}

Next we’ll want to add the styles for .person-enter.person-enter-active. These will be the styles that we want to animate to. Because we’re going from invisible to visible we’ll adjust the opacity:

.person-enter.person-enter-active{
	opacity: 1;
}

Classes for Removing an Element
Now we’ll add the class to animate from. This will the opposite of what we used when adding an element – start visible, go to invisble:

.person-leave{
	-webkit-transition: 1s linear all;
	-moz-transition: 1s linear all;
	-ms-transition: 1s linear all;
	-o-transition: 1s linear all;
	transition: 1s linear all;
	opacity: 1;
}

And finally the class to animate to when an element is removed:

.person-leave.person-leave-active{
	opacity: 0;
}

All Together Now
Finally we can put the whole thing together. The people boxes should now fade out and in whenever an element is added or removed. You can see it in action here: JSFiddle Demo


		Test Animation


			.person{
				padding: 20px;
				width: 50px;
				height: 50px;
				background-color: #E8FCE4;
				border: 1px solid #C0E2BB;
				float: left;
				margin: 5px;
				text-align: center;
				box-shadow: 2px 2px 2px #DAD3D3;
				text-shadow: 0px -1px 1px #FFF;
				cursor: pointer;
			}


			/*
				Note: you can condense these, however they've been split to make the explanation a little easier to follow;
			*/

			/* This is the class that will be animated *FROM* when a new person is added */
			.person-enter{
				-webkit-transition: 1s linear all;
				-moz-transition: 1s linear all;
				-ms-transition: 1s linear all;
				-o-transition: 1s linear all;
				transition: 1s linear all;
				opacity: 0;
			}

			/* This is the class that will be animated *TO* when a new person is added */
			.person-enter.person-enter-active{
				opacity: 1;
			}


			/* This is the class that will be animated *FROM* when a person is removed */
			.person-leave{
				-webkit-transition: 1s linear all;
				-moz-transition: 1s linear all;
				-ms-transition: 1s linear all;
				-o-transition: 1s linear all;
				transition: 1s linear all;
				opacity: 1;
			}

			/* This is the class that will be animated *TO* when a person is removed */
			.person-leave.person-leave-active{
				opacity: 0;
			}


Add
{{person.name}}
//ajax.googleapis.com/ajax/libs/angularjs/1.1.5/angular.min.js //Initialisation stuff, note that you don't need any of this for animations, just using it so there's something to see function PeopleController($scope){ $scope.name = ""; $scope.people = [ { name: "Santa Clause"}, { name: "Easter Bunny"}, { name: "Tooth Fairy"}, { name: "Chris Owens"}, { name: "Phillip Farnsworth"}, { name: "Clark Kent"}, { name: "Lana Lang"} ]; $scope.removePerson = function(row){ $scope.people.splice(row, 1); } $scope.addPerson = function(){ $scope.people.push({name: $scope.name}); $scope.name = ""; } }

Problems
If you’re having issues, one of the first things to check is that you’re on the right version of angular. There have been a lot of changes and many of the styles used in one this version don’t seem to work in the older ones. If there’s anything else that’s not working let me know!

Where to From Here?
There’s heaps more that nganimate can do, make sure you checkout http://www.nganimate.org/.
Australian Tax File Number Generator (TFN)

Updated Tool Available

There’s now an easier to access version of this tool available at the following link: Australian Tax File Number (TFN) Generator

Along with a few other widgets that have been added more recently:

Original Post

Sample Australian Tax File Numbers/Test Australian Tax File Numbers:

865414088 459599230 125486619
656077298 796801997 754601340
243494429 953615761 551953801
946489031 996506823 615315318
412042562 907974668 565051603

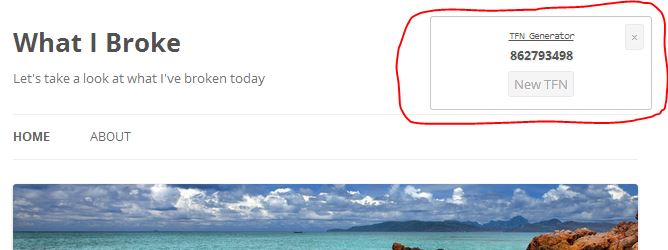
I came across an old VB Script used to generate random TFNs for testing. I’ve just done up a quick JavaScript bookmarklet to replace it. Just drag the button on the page below to your bookmarks bar and you’ll be able to generate random TFNs.

Get the generator: TFN Generator

A bookmarklet to generate random TFNs

For info on how it all works, checkout the Wikipedia page: Australian Tax File Number

UPDATE:
If you’re using IE, right click on the link and press add to favourites. Once you’ve added it, click the link in your favourites sidebar. The generator will appear in the top right hand corner of the page.

Let me know if you have any trouble. If you’d like to a custom or corporate copy please contact me.