Hi everyone,
This is just a quick post on how to create a pre-signed upload url for AWS S3 using Golang.
The generate the presigned url, you’ll need something like the following:
package main

import (
	"fmt"
	"github.com/joho/godotenv"
	log "github.com/sirupsen/logrus"
	"os"
	"time"

	"github.com/aws/aws-sdk-go/aws"
	"github.com/aws/aws-sdk-go/aws/session"
	"github.com/aws/aws-sdk-go/service/s3"
)

func main() {

	// Load env vars
	err := godotenv.Load(".env")
	if err != nil {
		log.Fatalf("Error loading .env file: %v", err)
	}

	// Load the bucket name
	s3Bucket := os.Getenv("S3_BUCKET")
	if s3Bucket == "" {
		log.Fatal("an s3 bucket was unable to be loaded from env vars")
	}

	// Prepare the S3 request so a signature can be generated
	svc := s3.New(session.New())
	r, _ := svc.PutObjectRequest(&s3.PutObjectInput{
		Bucket: aws.String(s3Bucket),
		Key:    aws.String("test-file.jpg"),
	})

	// Create the pre-signed url with an expiry
	url, err := r.Presign(15 * time.Minute)
	if err != nil {
		fmt.Println("Failed to generate a pre-signed url: ", err)
		return
	}

	// Display the pre-signed url
	fmt.Println("Pre-signed URL", url)
}
Note that we’re using godotenv to load AWS environment variables containing a few AWS keys. You can get godotenv by running the following:
go get github.com/joho/godotenv
I then have a file called “.env” sitting in the root of my working directory:
S3_BUCKET=<YOUR_BUCKET_NAME>
AWS_ACCESS_KEY_ID=<YOUR_AWS_ACCESS_KEY_ID>
AWS_SECRET_ACCESS_KEY=<YOUR_AWS_SECRET_ACCESS_KEY>
AWS_REGION=<YOUR_AWS_REGION>
Once you’ve got all of that setup you can run the script, it should output a link in your console window similar to the following:
Pre-signed URL https://YOUR_BUCKET.s3.YOUR_REGION.amazonaws.com/test-file.jpg?X-Amz-Algorithm=AWS4-HMAC-SHA256&X-Amz-Credential=CREDS&X-Amz-Date=20210717T073809Z&X-Amz-Expires=900&X-Amz-SignedHeaders=host&X-Amz-Signature=GENERATED_SIG
To test the url you can use something like Postman with the following configuration:
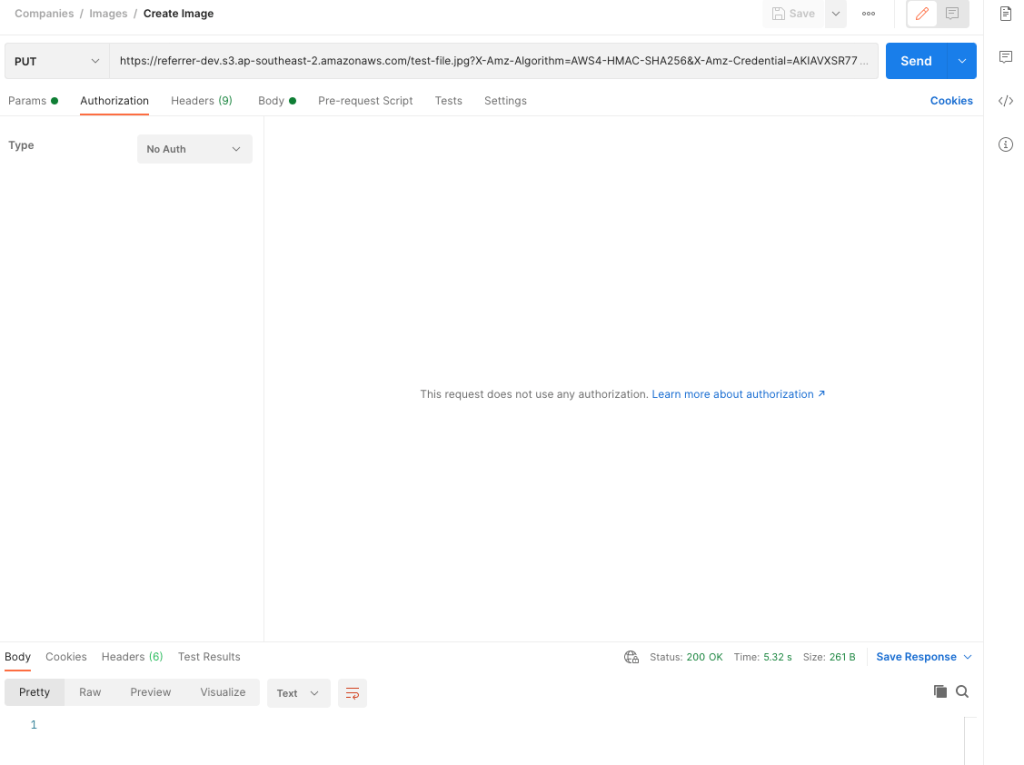
Simply pasting the url into the path should populate the headers for you. As for the body, select “binary” and browse for an image. When you’re ready, click “Send”.
You should get a 200 OK response and now be able to see your uploaded image in your destination bucket. Unless you’ve changed the key it should be under the name “test-file.jpg”.
One of the main advantages of using a pre-signed url is that it allows you to upload images directly to AWS and bypass your backend server completely. You can also use it to sign image retrievals. This allows you to give the links a limited life-span – great for preventing hot-linking.
Thanks to the following GitHub post for pointing me in the right direction: https://github.com/aws/aws-sdk-go/issues/467#issuecomment-171468806
