Just a quick post on something useful I came across today. In JavaScript you can access the stack trace via console using the following command (ctrl + shift + j):
console.trace()
In Chrome, this will let you navigate to each relevant call by clicking the line number in the console window. I’ve found it pretty useful for backtracking through jQuery exceptions.
Ran into a bit of an issue today where a url was being shortened in Chrome’s console. It turns out that there’s a quick command you can use to copy the full value:
copy(myVariable)
Type copy into the console window and pass the variable you want to copy as a parameter. This will then be saved to your clipboard for pasting.
Just a really basic model that can be used to send emails on GoDaddy in MVC4.
The model:
using System;
using System.Collections.Generic;
using System.ComponentModel.DataAnnotations.Schema;
using System.Linq;
using System.Web;
using System.Net.Mail;
using System.ComponentModel.DataAnnotations;

namespace LL.Models
{
    public class Email
    {
        [Key]
        public int EmailId { get; set; }

        public string From { get; set; }
        public string To { get; set; }
        public string Subject { get; set; }
        public string Body { get; set; }
        public DateTime Sent { get; set; }
        public string Status { get; set; }
        public string Log { get; set; }


        public void SendEmail()
        {
            MailMessage mail = new MailMessage();
            mail.To.Add(this.To);
            mail.From = new MailAddress(this.From);
            mail.Subject = this.Subject;
            mail.Body = Body;
            mail.IsBodyHtml = true;
            mail.Priority = MailPriority.Normal;

            SmtpClient smtp = new SmtpClient();
            smtp.Host = "relay-hosting.secureserver.net";
            smtp.UseDefaultCredentials = true;
            smtp.Port = 25;
            smtp.EnableSsl = false;

            try
            {
                smtp.Send(mail);
                this.Status = Fields.Status.Success;
            }
            catch(Exception e)
            {
                this.Log = e.Message;
            }

            this.Sent = DateTime.Now;
        }

        [NotMapped]
        public class Fields
        {
            public class From
            {
                public const String NoReply = "noreply@yoursite.com.au";
                public const String Support = "support@yoursite.com.au";
            }

            public class Status
            {
                public const String Success = "Success";
                public const String Error = "Error";
            }
        }

    }
}
Using it in a controller:
using LearnerLessons.Models;
using System;
using System.Collections.Generic;
using System.Linq;
using System.Web;
using System.Web.Mvc;

namespace LL.Controllers
{
    public class TestController : Controller
    {
        private LLDBContext db = new LLDBContext();

        public String TestEmail(String content)
        {
            Email email = new Email() { To = "lls@live.com.au", From = Email.Fields.From.NoReply, Body = content, Subject = "Test" };
            email.SendEmail();

            db.Emails.Add(email);
            db.SaveChanges();

            return email.ToString();
        }
    }
}
Update:
For a quick tutorial on how to use Razor views as email templates, check out the following post: http://www.whatibroke.com/?p=983
It looks like Google has removed the discussions search filter for some browsers (currently using Chrome Version 32.0.1700.76 m).
Hoping this is a bug and not another part of the “simplicity” trend they’re on at the moment.
Solution #1: Append &tbm paramter to url
A temporary fix is to add “&tbm=dsc” to the end of the search url. SilentEcho has added this script to automate it if you’re going to be using it a fair bit: http://userscripts.org/scripts/reviews/293082
Solution #2: Change Use Agent String
You can also use a user agent string of a browser that it still works for (I’ve heard Opera but haven’t verified).
Solution #3: Sign Out of Google Account
This didn’t work for me, however quite a few people are saying it does the job for them.
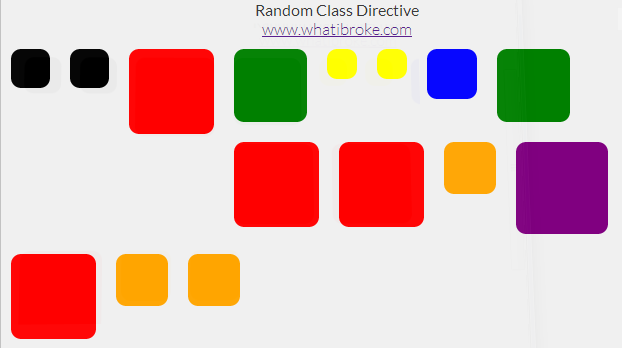
I used this directive to add a random background to each of my wrapper divs:
To use it in your app simply define a list of classes in your controller:
app.controller("MyCtrl", function MyCtrl($scope) {

    /* A random class is picked from this list */
    $scope.classes = [
        //"bg-buildings",
        "red",
        "blue",
        "yellow",
        "green",
        "orange",
        "black",
        "purple"
    ];
});
Then add the directive to your page (can be an existing element):
A random class will then be selected from the list and appended to the elements current list of classes (if any).
The easiest way to see how it’s done is probably just to check out the fiddle above, but there’s a code dump below if you need it:
The Random Class Directive
app.directive("ngRandomClass", function () {
    return {
        restrict: 'EA',
        replace: false,
        scope: {
            ngClasses: "="
        },
        link: function (scope, elem, attr) {

            //Add random background class to selected element
            elem.addClass(scope.ngClasses[Math.floor(Math.random() * (scope.ngClasses.length))]);
        }
    }
});
/*
    http://www.whatibroke.com/?p=899
    Adds a random class to element
    Usage: add ng-random-class to element
*/

var app = angular.module('myApp', []);

app.controller("MyCtrl", function MyCtrl($scope) {

    /* A random class is picked from this list */
    $scope.classes = [
        //"bg-buildings",
        "red",
        "blue",
        "yellow",
        "green",
        "orange",
        "black",
        "purple"
    ];
});
Just a dummy implementation of a Parallel Payment and an accompanying IPN Handler using the C#/.NET SDK. Feel free to use it however you like.
//Handles PayPal IPN
        public String IPN()
        {
            //Post back to either sandbox or live
            string strSandbox = "https://www.sandbox.paypal.com/cgi-bin/webscr";
            //string strLive = "https://www.paypal.com/cgi-bin/webscr";
            HttpWebRequest req = (HttpWebRequest)WebRequest.Create(strSandbox);

            ////Set values for the request back
            req.Method = "POST";
            req.ContentType = "application/x-www-form-urlencoded";
            byte[] param = Request.BinaryRead(Request.ContentLength);
            string strRequest = Encoding.ASCII.GetString(param);
            strRequest += "&cmd=_notify-validate";
            req.ContentLength = strRequest.Length;

            //Send the request to PayPal and get the response
            StreamWriter streamOut = new StreamWriter(req.GetRequestStream(), System.Text.Encoding.ASCII);
            streamOut.Write(strRequest);
            streamOut.Close();
            StreamReader streamIn = new StreamReader(req.GetResponse().GetResponseStream());
            string strResponse = streamIn.ReadToEnd();
            streamIn.Close();

            if (strResponse == "VERIFIED")
            {
                //check the payment_status is Completed
                //check that txn_id has not been previously processed
                //check that receiver_email is your Primary PayPal email
                //check that payment_amount/payment_currency are correct
                //process payment
            }
            else if (strResponse == "INVALID")
            {
                //log for manual investigation
            }
            else
            {
                //log response/ipn data for manual investigation
            }


            return "";
        }

        //Pay for an order
        public void Pay(int OrderId)
        {
            RequestEnvelope envelopeRequest = new RequestEnvelope();
            envelopeRequest.errorLanguage = "en_US";
            PaySample paySample = new PaySample();

            List listReceiver = new List();
            // Amount to be credited to the receiver's account
            Receiver receiverA = new Receiver(Convert.ToDecimal("4.00"));

            // A receiver's email address
            receiverA.email = "test_buyer1@learnerlessons.com.au";
            listReceiver.Add(receiverA);

            // Amount to be credited to the receiver's account
            Receiver receiverB = new Receiver(Convert.ToDecimal("2.00"));

            // A receiver's email address
            receiverB.email = "test_buyer2@learnerlessons.com.au";
            listReceiver.Add(receiverB);

            ReceiverList receiverList = new ReceiverList(listReceiver);

            PayRequest requestPay = new PayRequest(envelopeRequest, "PAY", "http://localhost:53034/orders/cancel", "AUD", receiverList, "http://localhost:53034/orders/return");
            requestPay.reverseAllParallelPaymentsOnError = true;
            requestPay.ipnNotificationUrl = "http://123.123.123.123/Orders/IPN";

            //Send request to paypal, retrieve payKey
            PayResponse payResponse = paySample.PayAPIOperations(requestPay);

            Response.Redirect("https://www.sandbox.paypal.com/cgi-bin/webscr?cmd=_ap-payment&paykey=" + payResponse.payKey);
        }
I’ve been mucking around with the C# SDK for PayPal Adaptive Payments. Unfortunately the docs aren’t too great and the samples are a little confusing until you get your head around them.
One of the main issues I’ve had is working out how to configure payment request settings i.e. reverseAllparallelPaymentsOnError.
Just setting up an app that using the .NET Adaptive Payments SDK. Looking through the sandbox I was able to find the api signature, password and username but not the application ID (My Account > Overview > Account Information > API Access).
It turns out that ALL sandbox apps share the same ID:
And then to access the ID parameter I used $routeParams:
/* Used to display the lesson planner for customers */
app.controller("CustomerPlannerController", function ($scope, $routeParams /*, ... */) {
     console.log($routeParams);
     console.log($routeParams.id);
}
Using that setup, a route to /Businesses/Details/:id will display the following output in the console:
//Route to: /Businesses/Details/:id
Object {id: "1"}
1
I’ve been mucking around with directives for that last few days and one of my requirements has been a simple timepicker. Nothing too fancy, but if anyone would like to use it – feel free.
The hours and minutes will then be updated whenever the user changes the value. If you need any other hooks it’s fairly easy to modify and there are a heap of comments.
You may also want to put the HTML in an external template. Just make the following changes to the directive (note templateURL):
The JSFiddle is probably the easiest way to see how it all works. You can simply copy it from there to your app. Alternatively, I’ve dumped the code below:
Uncondensed HTML (for those who prefer to use a template)
{{displayHours()}}
{{displayMinutes()}}
= 12" class="display">
PM
<div ng-if="hours
AM
Timepicker Directive
/*
http://www.whatibroke.com/?p=899
*/
var app = angular.module('myApp', []);
app.controller("MyCtrl", function MyCtrl($scope) {
    $scope.hours = 11;
    $scope.minutes = 45;
});
app.directive("ngTimeSelector", function () {
return {
restrict: 'EA',
template: '
            {{displayHours()}}


            {{displayMinutes()}}


        = 12" class="display">
            PM

        <div ng-if="hours
            AM
',
scope: {
hours: "=",
minutes: "="
},
replace: true,
link: function (scope, elem, attr) {
//Create vars
scope.period = "AM";
/* Increases hours by one */
scope.increaseHours = function () {
//Check whether hours have reached max
if (scope.hours < 23) {
scope.hours = ++scope.hours;
}
else {
scope.hours = 0;
}
}
/* Decreases hours by one */
scope.decreaseHours = function () {
//Check whether hours have reached min
scope.hours = scope.hours = 59) {
scope.minutes = 0;
}
else {
scope.minutes++;
}
}
/* Decreases minutes by one */
scope.decreaseMinutes = function () {
//Check whether to reset
if (scope.minutes 12) {
hoursToDisplay = scope.hours - 12;
}
//Check for 12 AM etc
if (hoursToDisplay == 0) {
//Set to am and display 12
hoursToDisplay = 12;
}
else {
//Check whether to prepend 0
if (hoursToDisplay <= 9) {
hoursToDisplay = "0" + hoursToDisplay;
}
}
return hoursToDisplay;
}
/* Displays minutes */
scope.displayMinutes = function () {
return scope.minutes = 12 ? scope.hours - 12 : scope.hours + 12;
}
}
}
});